Contents
Introduction
This plugin is an extended version of free Checkout Files Upload for WooCommerce plugin. Pro version lets you add multiple file upload forms to the checkout (and/or thank you; my account pages).
Retrieving Uploaded Files
You can download uploaded files from admin’s “Edit Order” pages (there is “Uploaded Files” metabox in the upper right corner). Alternatively – if you wish to access files directly – uploaded files are saved in /wp-content/uploads/woocommerce_uploads/alg_uploads/checkout_files_upload/ directory on your server. Files are named by concatenating order number and file number (e.g. 1347_1.png, 1347_2.jpg etc.).
If you’re having issues with file upload form displaying on mobile devices, you can fix this by going to “WooCommerce > Settings > Checkout Files Upload > Template” and setting these values:
Before:
<div>
Label:
<p><label for="%field_id%">%field_label%</label>%required_html%</p>
Field:
<p>%field_html%</p><p>%button_html%</p>
After:
</div>
This will change the layout of checkout files form a little, but it should fix any issues with mobile devices.
Settings
General Options
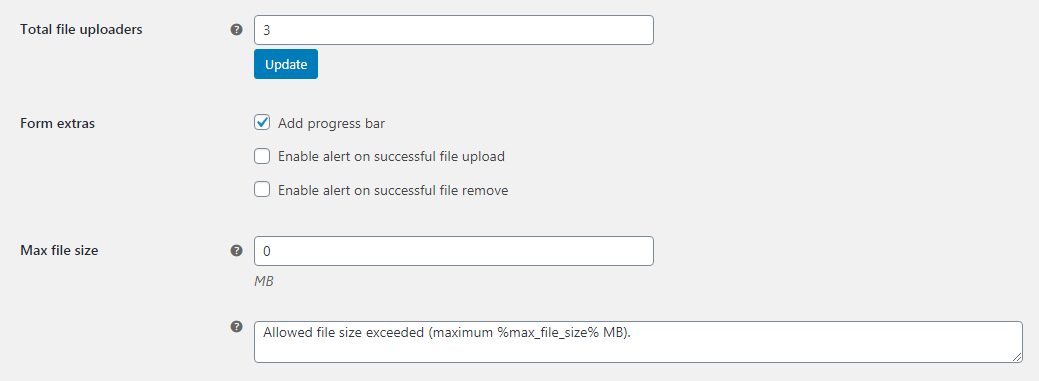
- Total file uploaders
- Determines how many file uploaders you can configure. Save changes after you change this number to see the new settings sections appear. (See File Uploader #X)
- Default:
1
- Default:
- Form extras: Add progress bar
- Shows a green progress bar under each file when it is uploaded.
- Default:
no
- Default:
- Form extras: Enable alert on successful file upload
- Displays an alert message after successful upload.
- Default:
no
- Default:
- Form extras: Enable alert on successful file remove
- Displays an alert message after file removed.
- Default:
no
- Default:
- Max file size (MB)
- Leave zero to disable.
- Default:
0
- Default:
- Max file size: Allowed file size exceeded message
- Message on exceeded. Replaced value:
%max_file_size%.- Default:
Allowed file size exceeded (maximum %max_file_size% MB).
- Default:
Emails Options
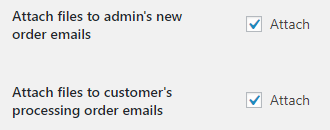
- Attach files to admin’s new order emails
- Default:
yes
- Default:
- Attach files to customer’s processing order emails
- Default:
no
- Default:
Form Template Options
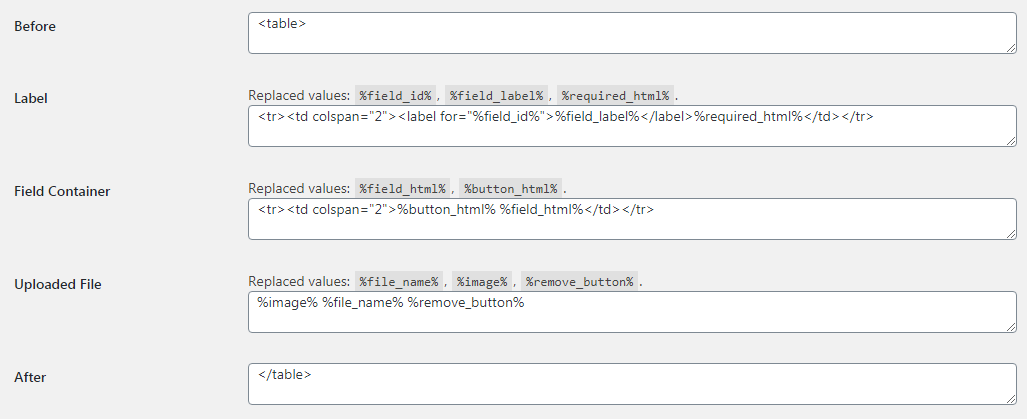
- Before
- Default:
<table>
- Default:
- Label
- Replaced values:
%field_id%,%field_label%,%required_html%.- Default:
<tr><td colspan="2"><label for="%field_id%">%field_label%</label>%required_html%</td></tr>
- Default:
- Field Container
- This is the main part of the file uploader.
Replaced values:%button_html%(the “Choose Files” button),%field_html%(where the uploaded files will be displayed).- Default:
<tr><td colspan="2">%button_html% %field_html%</td></tr>
- Default:
- Uploaded File
- This is the template for each file after being uploaded.
Replaced values:%image%(a thumbnail image),%file_name%(the file name),%remove_button%(a button to remove the file).- Default:
%image% %file_name% %remove_button%
- Default:
- After
- Default:
</table>
- Default:
Styling Options

- “Delete” button style
- CSS styles applied to the Delete button.
- Default:
color:red;
- Default:
- Image style
- CSS styles applied to the image thumbnail.
- Default:
width:64px;
- Default:
File Uploader #X
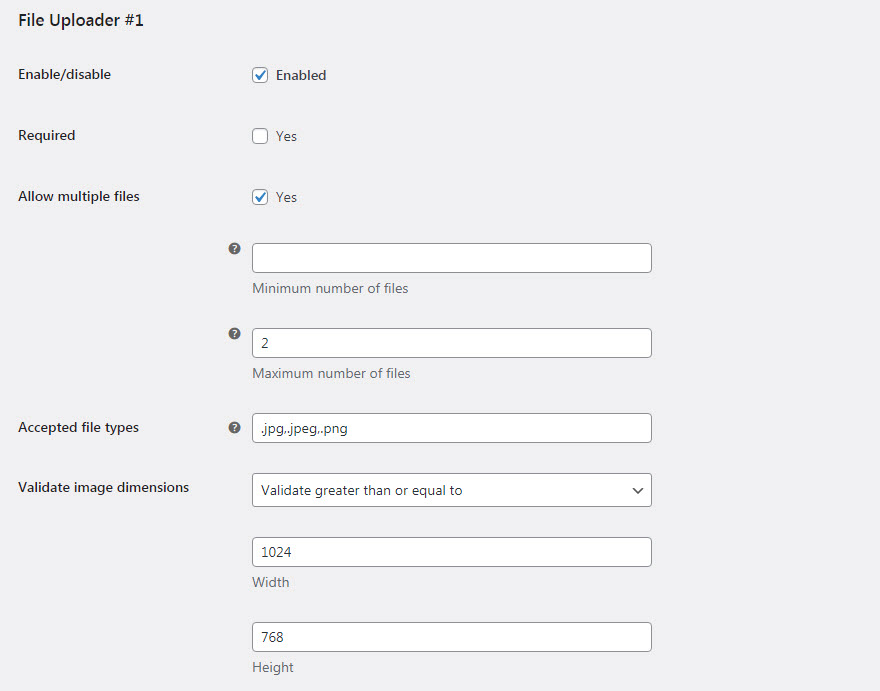
In the premium version, you can configure as many File Uploaders as you want. Each one will be assigned a number, i.e. File Uploader #1, File Uploader #2, etc. Each File Uploader will have its own unique settings. To add more File Uploaders, adjust the setting “Total file uploaders” under General Options.
- Enable/disable
- Default:
yes
- Default:
- Required
- Makes the file upload mandatory.
- Default:
no
- Default:
- Allow multiple files
- Allows multiple files to be uploaded at once.
- Default:
no
- Default:
- Minimum number of files
- Optional. If “Allow multiple files” is enabled, this setting would require a minimum number of files be uploaded before checkout is completed. Leave blank for no minimum.
- Default:
(blank)
- Default:
- Maximum number of files
- Optional. If “Allow multiple files” is enabled, this setting would limit the maximum number of files that can be uploaded before checkout is completed. Leave blank for no maximum.
- Default:
(blank)
- Default:
- Accepted file types
- A list of accepted file types, separated by commas. E.g.:
.jpg,.jpeg,.png. Leave blank to accept all files.- Default:
.jpg,.jpeg,.png
- Default:
- NOTE: WordPress may block certain file types for security reasons, and our plugin will be subject to the same restrictions regardless of what you enter here. If you need to adjust the types of files allowed, you can do it following the steps in this article. (If you’re not sure, we recommend you do a test upload into your WordPress Media dashboard — if it works there, it will work with our plugin.)
- Validate image dimensions
- Optional. Sets requirements for the dimensions of uploaded images. Possible values: Do not validate, Validate exact size, Validate greater than or equal to, Validate less than or equal to, Validate ratio
- Default:
Do not validate
- Default:
- Width
- Optional. The width, in pixels, to be used by the “Validate image dimensions” setting.
- Default:
(none)
- Default:
- Height
- Optional. The height, in pixels, to be used by the “Validate image dimensions” setting.
- Default:
(none)
- Default:
Positions
If you are using the new blocks-based Checkout page, our uploader will not be displayed until you make a few minor changes, see here: Troubleshooting Display Issues
- Checkout page
- Possible values: See full list here.
- Default:
Before checkout form
- Default:
- Position order (i.e. priority)
- Default:
20
- Default:
- “Thank You” page
- Default:
no
- Default:
- “My Account” page
- Default:
no
- Default:
Labels
- Label
- Leave blank to disable label.
- Default:
Please select file to upload
- Default:
- Upload button (single)
- Default:
Choose File
- Default:
- Upload button (multiple)
- Default:
Choose Files
- Default:
Notices
- Wrong file type
%swill be replaced with file name.- Default:
Wrong file type: "%s"
- Default:
- Wrong image dimensions
%swill be replaced with file name.
%current_width%will be replaced with the current image’s width, in pixels.
%current_height%will be replaced with the current image’s height, in pixels.
%required_width%will be replaced with the required width, in pixels.
%required_height%will be replaced with the required height, in pixels.- Default:
Wrong image dimensions for "%s". Current: %current_width% x %current_height%. Required: %required_width% x %required_height%.
- Default:
- Couldn’t get image dimensions
%swill be replaced with file name.- Default:
Couldn't get image dimensions: "%s"
- Default:
- File is required
- Default:
File is required.
- Default:
- Too few files uploaded
%swill be replaced with the minimum number of files.- Default:
Too few files uploaded. Minimum %s file(s) are required.
- Default:
- Too many files uploaded
%swill be replaced with the maximum number of files.- Default:
Too many files uploaded. Maximum %s file(s) are allowed.
- Default:
- File was successfully uploaded
%swill be replaced with file name.- Default:
File "%s" was successfully uploaded.
- Default:
- File was successfully removed
%swill be replaced with file name.- Default:
File "%s" was successfully removed.
- Default:
Advanced
- Require products
- To show this field only if at least one selected product is in cart, enter products here. Leave blank to show for all products.
- Default: None
- Require product categories
- To show this field only if at least one product of selected category is in cart, enter categories here. Leave blank to show for all products.
- Default: None
- Require product tags
- To show this field only if at least one product of selected tag is in cart, enter tags here. Leave blank to show for all products.
- Default: None
Shortcode
Checkout Files Upload has a shortcode [wpwham_checkout_files_uploader] which you can use to manually place an uploader on the Checkout page.
PLEASE NOTE: This shortcode will NOT work outside of the Checkout page, and specifically not anywhere outside of the checkout form. It may display but it will not do anything unless it gets output within the <form></form> tags of the Checkout page.
The preferred way to place your File Uploader is via the Positions settings, but if this is not possible (for example, if you are using a Blocks-based Checkout page), the shortcode is a way you can insert an uploader inside a Checkout Block. To use it, add [wpwham_checkout_files_uploader] somewhere WITHIN the Checkout Block. Do not use a “shortcode” block, just type [wpwham_checkout_files_uploader] somewhere within the Checkout Block as plain text.
If you have multiple File Uploaders, by default our shortcode will display all the uploaders available to be displayed. If you want to show just one specific File Uploader, you can add an id attribute, like this: [wpwham_checkout_files_uploader id="1"] (where the “id” number matches the File Uploader #, see File Uploader #X.
Troubleshooting
If you are having trouble, a good place to start is our Troubleshooting Guide. Also be sure that your site meets the Minimum System Requirements.
If you have any other issues or need further assistance, simply open a support ticket.
Why isn’t the uploader appearing?
New installations of WooCommerce have changed the Checkout page from the traditional template-based one to a new blocks-based one. Unfortunately blocks (as of this writing) completely ignore the hooks that our plugin depends on. To get around this, you can either:
- Switch back to the template-based Checkout page. To do this, edit your Checkout page and remove all the blocks from it, then replace it with 1 shortcode:
[woocommerce_checkout]. This will bring back the traditional WooCommerce checkout.
Or: - If you want to keep the blocks-based Checkout page, you need to add our shortcode
[wpwham_checkout_files_uploader]somewhere WITHIN the Checkout block. Do not use the “shortcode” block, just enter our shortcode somewhere within as plain text. The shortcode must placed somewhere within the Checkout form or it will not work (it will be displayed, but it will not actually upload anything anywhere outside of the Checkout <form>).
PHP Sessions
Checkout Files Upload requires PHP Sessions support. This is a feature built into PHP, and on the vast majority of servers/web hosts you don’t have to do anything — it just works. However if your host lacks support for PHP sessions (for example Pantheon) you may need to install the free WordPress Native PHP Sessions plugin to make it work.
Varnish, Memcached
If you are using a caching system like Varnish or Memcached, you might need to exclude the PHP Session cookie from being cached, to allow it to work properly. We do not set any special name for the PHP Session, so it will be whatever you’ve set in your PHP settings (the default name is “PHPSESSID”). If you are using Cloudways, there is an explanation of how to do this here: https://support.cloudways.com/how-to-include-or-exclude-cookies-from-varnish/.
Additionally, the following page has good info about getting Varnish and WooCommerce to work together in general: https://wpbeaches.com/using-woocommerce-with-varnish-exclude-pages-and-cookies/.
Cache Plugins
If you are using a caching plugin you might need to exclude the PHP Session cookie from being cached, to allow it to work properly. We do not set any special name for the PHP Session, so it will be whatever you’ve set in your PHP settings (the default name is “PHPSESSID”). For example if you are using WP Rocket, add the name of your PHP Session cookie (“PHPSESSID”) to the “Never Cache Cookies” list under WP Rocket / Advanced Rules:
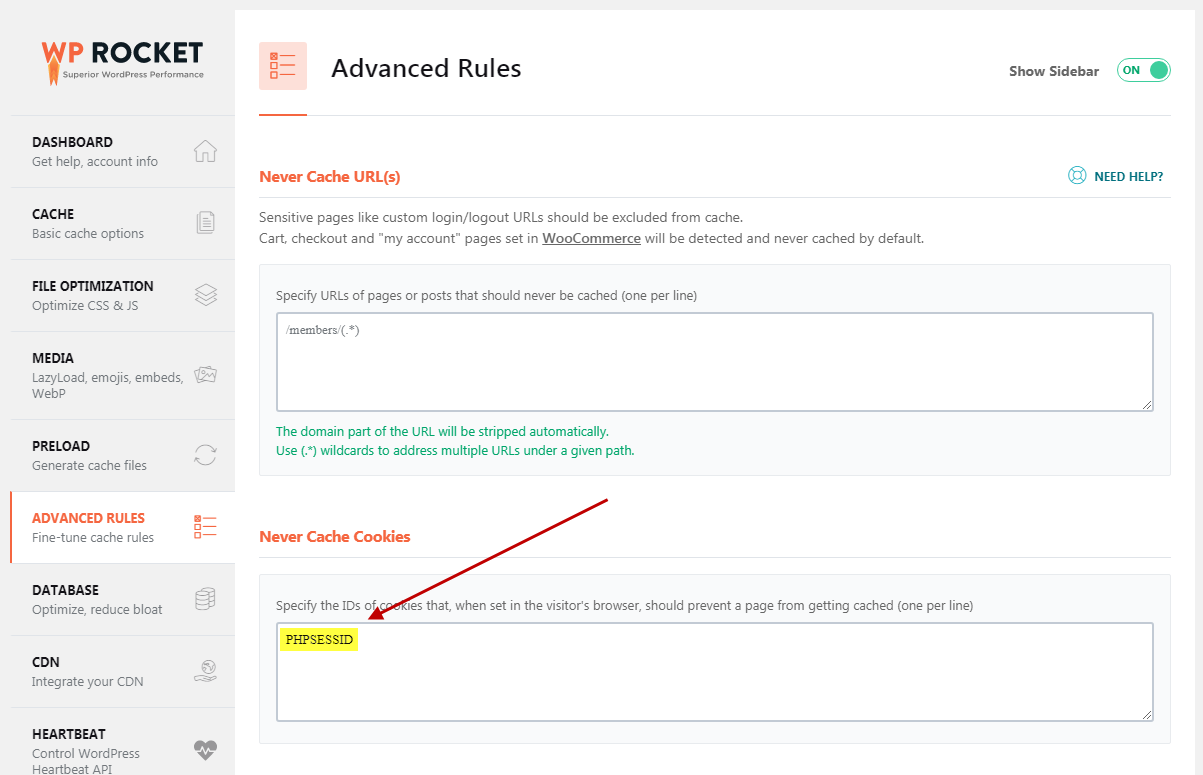
If you are using a different caching plugin, you will want to find it’s equivalent setting and enter the same value.


 30-Day No Hassle Refund Policy